Showing posts with label baking. Show all posts

Wednesday, November 4, 2015

Autumn in the Hollow

Fall has very belated and abruptly, finally fallen on Boggy Hollow. The garden is very nearly wrapped up for the year, though not put to bed yet, that being a ginormous task unto itself. 

The temperature gauge on my car's dashboard read 39 degrees at 7:00 this morning, so I guess I'd better make it a priority to harvest the last of my hoop-house pimento and jalapeƱo peppers this afternoon before Jack Frost gets them. We also have a few scraggling pumpkins left out there, but - being volunteer mystery mixes - they're all destined to be chicken and turkey food anyway, so their cosmetic condition is not quite so important. To be honest, I'll be relieved when everything is buttoned up for the season.

I've been keeping fairly good track of our garden's productivity this year, but, as always tends to happen, I slacken off as the growing season progresses. Back in March/April, if we brought in a quarter pound of snap peas, it was written up in the log straight away. Now? We'll weigh one pumpkin and just assume the the rest of roughly the same size weigh roughly the same thing, and scratch it in the journal (maybe) when/if I remember to.

But anyway - I was talking of embracing the falling of Fall. Apparently a switch flipped and now I'm in hardcore Cozy Mode. In the past few days, I've suddenly rediscovered my love of knitting and have had my food dehydrator running 24/7, trying to put up one last jar/bag of pumpkin seeds, sunflower seeds, calendula, spearmint, chamomile... etc. You name it, I'm drying it out and squirreling it away.

A new addition to my squirrelin' repertoire this year - wild mushrooms. Bill and I have always loved foraging, but were extremely intimidated about the idea of venturing into the world of mushrooms, as there is basically no room for error in identification. After reading half a dozen mushroom-specific guides and psyching ourselves up, a friend finally talked us into giving mushroom hunting a try by giving us the directions to his 'never fail' spot for lobster mushies. It was a bust for us. We've gone on hunts for morels, chanterelles, chicken of the woods and lobster mushrooms, all with ZERO luck. How bizarre it was then, to finally positively i.d. a much sought-after edible, the King Bolete (aka Porcino) mushroom growing in our very own yard!

Teeny-Weeny Porcini!
A very good day's haul
And to think that these have been growing there for years and we never realized - d'oh!

Apparently, they usually wrap up their Autumn flush in November, so I don't know how many more of these lovelies that I'll get before they're gone for the year, so I've been furiously hunting/cleaning/processing/drying them these past few weeks, trying to them all in while the gettin's still good.

Besides knitting and fiddling with mushrooms, I've finally got my baking groove back! Today's bake - a triple batch of Gingerbread biscotti. I've made this recipe several times and it always goes over big with anyone who has tried it. The smell of this in the oven will kick you into Cozy Mode lickity-split!


Lightly sweet and satisfyingly crunchy, Gingerbread Biscotti.

Gingerbread Biscotti 
Recipe courtesy of ShugarySweets.com
Prep Time: 15 minutes
Cook Time: 35 minutes
Yield: 12 large biscotti
Crunchy Gingerbread Biscotti is easy to make and delicious too. Have your coffee ready!
Ingredients
  • 6 Tbsp unsalted butter, softened
  • 3/4 cup granulated sugar
  • 2 large eggs
  • 2 Tbsp molasses
  • 1 tsp cinnamon
  • 1 tsp allspice
  • 1 cube Dorot crushed ginger (or 1 tsp), thawed*
  • 2 cup all-purpose flour
  • 1 tsp baking powder
  • 1/4 cup sparkling white sugar
  • 4 oz vanilla candy coating, melted
Instructions
  1. Preheat oven to 350 degrees F.
  2. In a large mixing bowl, beat butter with sugar until combined. Add in eggs and molasses. Beat in spices, flour, and baking powder.
  3. On a parchment paper lined baking sheet, shape dough into a 12x4 inch rectangle, patting evenly. Sprinkle with sparkling white sugar. Bake for 22-25 minutes. Remove from oven and cool 5 minutes. Slice biscotti into 12, one inch wide slices. Arrange biscotti onto sides, separating them on the baking sheet. Return to oven and bake an additional 6 minutes. Remove and turn them to opposite side, bake another 6 minutes.
  4. Remove biscotti and cool completely.
  5. Once cooled, dip bottom of biscotti in melted vanilla candy coating. Set back on parchment paper until set, about 15 minutes. Store in airtight container. ENJOY.
Notes
For the crushed ginger, thaw on counter while getting ingredients and baking sheet ready. OR, place in a small glass bowl and microwave for 5-10 seconds.
*I (Michelle) actually used fresh grated ginger instead, as that is what I had on-hand.

Happy fall, y'all! :)

Thursday, November 29, 2012

Ina's Shortbread

This is yet another eggless wonder! The hens gave us exactly one egg last week, and I'm pretty sure it was from one of the bantams no less. I was robbed!

I decided to branch out from my tried and true Spiced Pumpkin Scones and further explore the possibilities of baking in an world sin huevos. I needed to make something for the school's bake sale and it had to be a) nut-free (school rule), b) eggless (I shake my fist in your general direction, chickens!), c) foolproof. These parameters whittled down my options considerably. Of the remaining few, I settled on trying shortbread.

I used Ina Garten's shortbread recipe, so I pretty much knew it was gonna rock. As a generously-proportioned woman myself, I am rather suspicious of skinny chefs (I'm looking at you, Giada), and given the choice, will go with the chef who looks like they actually eat. Ergo, Ina=Awesome.

These badboys call for exactly 5 ingredients - (a boatload of) butter, sugar, vanilla, flour and salt. Nice and simple, and most importantly, no eggs!


Was I right or was I right? AWESOME.

I iced them with a butterscotch glaze and sprinkled shredded coconut on a few. They are a cardiologist's nightmare. Completely non-artery-friendly and absolutely divine.

Monday, November 19, 2012

Recipe: Spiced Pumpkin Scones (eggless)


What to do when autumn-induced baking fever hits at the same time as your hens go on strike?

Well, I could...
a) Break down and buy eggs (pish-posh! As if!),
b) Google "eggless baking" and get a lot of questionable-looking vegan muffin recipes, or
c) Throw caution to the wind and try a recipe that calls for eggs, but without the eggs.

Don't mind me, I'm just living on the razor's edge over here. ;)

I came across a Spiced Pumpkin Scone recipe that looked promising. The original recipe only called for a single egg anyway, and I'd recently seen an article that suggested that a whole mess of fairly common kitchen ingredients that could stand in for an egg in baked goods - applesauce, mashed banana, flax seed meal, whole milk yogurt, etc. So, I gave it a whirl. The result - delicious! The recipe that I used compares these pumpkin scones to those available at Starbucks. And they do taste a lot like Starbie's scones, but are actually lighter-textured and appreciably less dense than the original.


Soft, flaky, spiced and very lightly sweet - Autumn comfort in a pastry.


Spiced Pumpkin Scones
Recipe via SweetPeasKitchen.com, with my fudges noted.

2 cups all-purpose flour
1/4 cup and 3 tablespoons granulated sugar
1 Tablespoon baking powder
1/2 teaspoon salt
1/2 teaspoon ground cinnamon
1/2 teaspoon ground nutmeg
1/4 teaspoon ground cloves*
1/4 teaspoon ground ginger*
6 tablespoons cold butter, cut into 1-inch cubes
1/2 cup pumpkin puree (about half of a roasted, small Sugar Pie pumpkin)
3 tablespoons half-and-half**
1 large egg**

*Save yourself the trouble and substitute pumpkin pie spice instead, if you have it.
**I substituted 1/3 c. plain whole yogurt for the egg and half & half

Preheat the oven to 425 degrees F. Line a baking sheet with parchment paper; set aside.
In the bowl of a stand mixer fitted with fit the paddle attachment, stir together the flour, sugar, baking powder, salt, cinnamon, nutmeg, cloves and ginger. Add the butter and toss with a fork to coat with the flour mixture. Mix on medium-low speed until the texture resembles coarse cornmeal, with the butter pieces no larger than small peas.

In a separate bowl, whisk together the pumpkin, half-and-half and egg (or yogurt). Fold wet ingredients into dry ingredients, and form the dough into a ball. Pat out dough onto a lightly floured surface and form into a 1-inch thick rectangle about 4 inches by 12 inches. Use a large knife to slice the dough making three equal portions. Cut each of the portions in an X pattern (four pieces) so you end up with 12 triangular slices of dough. Place on prepared baking sheet. Bake for 14-16 minutes*, or until light brown. Place on wire rack to cool.

*Mine needed 20 minutes to bake through.

I'm still fiddling with a few maple/brown sugar icing recipes to drizzle on these scones. I want big flavor in an icing that dries to have a nice crunch when you bite into it, but so far, I'm not thrilled with what I've been able to come up with. Guess I'll have to make more scones...

By the way - I also added about 1/4 cup of dried sour cherries to a batch - fantastic. I plan to try some with dried cranberries and/or maybe a teensy bit of finely diced candied ginger (that stuff packs a PUNCH), just to see which tweaks, if any, bring a little something extra to an already really good, really wholesome scone. 

Monday, November 5, 2012

Recipe: Easy, Homemade Biscuits & Dumplings


My basic biscuit and dumpling recipe are one in the same. These are just so easy to whip up, and are made using wholesome, real ingredients that I guarantee you already have at your house. A batch makes 24 small biscuits and the ingredients only cost around fifty cents! Beat that, Pillsbury! ;)


Chelle's Biscuit & Dumpling Mix

*2 cups all-purpose flour
*4 tsps baking powder
*1 tsp salt
*4 tbsps butter (cold)
*1 cup milk

Whisk dry ingredients together well. Cut cold butter into pea-sized pieces, and mix (but don't smash! You want lumps in your mix!) into dry ingredients. Add milk and mix until just incorporated.

If using as dumplings, drop by spoonfuls into simmering soup. Simmer with the lid on for 5 minutes, then 5 more minutes with the lid off or until the dumplings are cooked through, and mostly dry on top. Sprinkle with paprika, if you are so inclined. Serve.

If making drop biscuits, drop by heaping tablespoons onto a well greased or non-stick cookie sheet (I actually use a 24-cup mini muffin pan for my biscuits most of the time). Bake @ 425 for about 10-15 minutes. Biscuits need to be cooked hot, but don't stray too far - they can burn pretty quickly!

Variations-

*Replace some or all of the butter with lard or rendered bacon fat
*Add 1/2 - 1 cup of parmesan cheese or grated cheddar cheese
*Use seasoned or garlic salt in place of the regular salt
*Add a few fresh or dried herbs - chives, marjoram, parsley, rosemary, etc.
*Use buttermilk instead

Red Lobster-style Biscuits-

Follow main recipe as listed above with the following changes/additions -

*Add 1 cup shredded cheddar to the mix
*Replace regular salt with garlic salt
*When fresh out of the oven, brush biscuits with a generous amount of melted butter, then dust with a little garlic powder or garlic salt.

Enjoy!

Friday, September 21, 2012

Use it or Lose it - Homegrown Pears


Walnuts and pears, you plant for your heirs.

Have you heard this expression before? Apparently, it is an old English adage that eludes to the decades-long wait you could expect between planting and harvesting fruits from a pear or walnut tree. Although advances in grafting techniques and selective breeding have nearly done away with this agonizing wait, in generations past, you might reasonably expect to wait up to 20 years for your first harvest, which made planting a slow-growing fruit tree an act of implicit optimism.

Whoever planted our pear and apple trees, however long ago, thank you. They've brought us, our critters and assorted visiting wildlife much delight and sustenance.

I don't know what we did right, in fact, I don't know if we had anything to do with it at all, but this year, our little orchard really outdid itself. For the first time since we've lived here, the pear tree had an honest-to-goodness crop, about 20 pounds of fruit.

Twenty pounds may not seem like all that much, and in farming terms, it really isn't. But, keep in mind that all twenty highly-perishable pounds come ripe at the same time, and you find yourself with a 5 day window, give or take, in which to use up your bounty or lose it to the compost heap.

I hemmed and hawed for a few days before starting in on my pears in earnest, and just last night, finally used the last of them up. Here's how I used them-

Pear Fruit Leather (I did not add any sugar, as it was totally unnecessary, and I used my little dehydrator instead of my oven. Otherwise, my process was the same.)


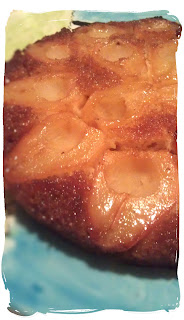
Pear Upside-Down Cake
(adapted from Nectarine Upside-Down Cake by Full Circle)
My modifications are noted by *

-10 tbsps unsalted butter, room temperature
-1/2 cup brown sugar
-4 cups pears, peeled and halved, with stem and blossom ends trimmed off, and cores removed*
-1 1/2 cups all-purpose flour**
-1 1/2 tsps baking powder
-1/2 tsp baking soda
-1/2 tsp sea salt
-3/4 cup granulated sugar
-2 eggs
-1 tsp vanilla extract***
-1/2 cup plain Greek yogurt

Preheat oven to 325 degrees. Place 4 tablespoons of butter in a cake pan or oven-proof casserole dish, and melt in oven. When melted, sprinkle brown sugar evenly over top. Arrange pears in one even layer in bottom of pan.

In a medium bowl, sift together flour, baking powder, baking soda and salt.

In a separate bowl, beat remaining 6 tablespoons butter until light and fluffy. Add sugar and beat until well combined.  Add eggs, one at a time, followed by extract. Begin adding flour mixture in small amounts, alternating with additions of the plain yogurt. Mix well between each addition. The result should be a very thick, pasty batter.

Pour over pears and level with a spatula. Bake until cake is dark golden brown, and passes the toothpick test, about 60 minutes. Let cool for 10 minutes, then run a knife gently around the sides before carefully inverting the pan onto a serving plate. Delicious while still warm or served cooled the next day. :)

*I use a melon baller for this
**I used half all-purpose flour and half cake flour, because I like the lightness and silkiness that cake flour brings.
***I used pure almond extract instead. Pears & Almonds=Peas & Carrots ;)

Pear Upside-Down Cake, fresh from the oven

Besides making leather and cake, we also ate some pears fresh and gave some away. I'd wanted to hold back a few to make Martha Stewart's Pear Frangipane Tart, but had neither almonds nor rum to hand, so it'll have to wait for another day, or another year, depending on whether or not I somehow come into some more pears before next Fall.

Thursday, August 2, 2012

Use it or Lose it - Buttermilk & Sweet Potatoes

This week's featured "everything must go!" ingredients are-

*Jewel Yams (actually a variety of sweet potato), about 2 pounds
*Goat Buttermilk, 1 quart
*Sour Cherries, 4 pounds
*Goats milk, 2 1/2 gallons
*Rendered Leaf Lard (pork), 1 cup +/-

It almost goes without saying that this time of the year, we'll have more milk than we know what to do with. Things could be worse! :)

This is our second year of having this very fortunate predicament, so we're slowly but surely learning how to use goat milk in things that we'd otherwise have used store bought cows milk in (white sauces, custards, etc.), as well as using it to make some of our own dairy products (cheese, butter) to replace or at the very least, reduce the amount of cow's milk dairy that we buy & consume.

We've also started socking a little bit of milk away in the deep freeze, for those dark days when the gals are lactating no-more, and we have a hankering for something creamy.

So, we popped 1/2 gallon of milk into the freezer for later use in cooking and/or soap making. We also pitted and froze the sour cherries for use in my very favorite jam, Summer Solstice preserves.

1 and 1/5th items down!

The buttermilk was homemade, using a quart (1/4 gallon) of whole goat's milk, warmed to 86 degrees, then inoculated with buttermilk culture and left to ripen overnight. What a delicious difference that little culture makes!

I used up the 3/4 of the buttermilk making a triple batch of buttermilk waffles that I also squirreled away in the freezer for a rainy day.

The rest of the buttermilk was used, along with 1 1/2 cups of the pureed yams, and 1/2 cup of the lard (in place of half of the butter), in a double batch of Martha Stewart's Sweet-Potato Biscuits. Heaven. on. earth.


As you can see, I used a small-mouthed mason jar ring in lieu of a proper biscuit cutter. It worked just fine, and that makes one less thing I have to hunt for in my kitchen. ;)

So, having frozen the milk & cherries, baked the biscuits and made the waffles, I'm left with 1 3/4 gallons of milk, 1/2 cups of lard and 1 cup of sweet potato puree. I put the puree into a silicone freezer tray and chucked it into the freezer to set-up. I'll pop out my yam cubes and bag them up, to eventually be used in soup.

As for the milk, I'm going to try and bribe/sweet talk Billy into making a double batch of 30-minute mozzarella to be used on Friday Pizza Night. I'll hang on to the lard, since I'm not exactly under the gun to use it, like I am the more perishable goods on my use or lose hit list.

Whew! That was a lot of baking and dish-dirtying for one day. I'm wiped! Now, excuse me while I go snarf down my third butter and jam smothered Sweet Potato biscuit. Being the chef has its perks. :)

Saturday, October 9, 2010

Recipe: Out-of-this-World Oatmeal Chocolate Chip Cookies

I'm not much of a baker. At least, historically, I haven't been. I'm a slayer of yeast and, up until we moved this summer, the owner of the world's crappiest oven. No more, my friends!

My new old house came with a new old oven. Oddly enough, the very same one that my Grandma G.G. used to have. It's a 30ish year-old Maytag and it works like a dream. Emboldened by my new-to-me, perfectly functional stove, I decided to make my girls some cookies.

Of course, my cookbooks are all still buried somewhere in a box in the basement, so instead I Googled a recipe for oatmeal chocolate chip cookies. I found one that sounded good, then naturally, I monkeyed with it. Let me just say this - Holy cow, NUM. I love these cookies. I crave these cookies. I eat them in such quantity that I probably should not make these at all anymore. And so, I must share the joy/addiction. The original recipe can be found here. The following is my modified (and if I may say so, improved) version.

Chelle's Oatmeal Chocolate Chip Cookies

1 1/2 cups unbromated, unbleached, All-Purpose Flour
1 teaspoon baking soda
1/2 tsp salt
1 cup (2 sticks) butter, softened
3/4 cup packed brown sugar
1/2 cup maple sugar
1 large egg
2 tbsps applesauce
1 teaspoon vanilla extract
3 cups old-fashioned oats, uncooked
1 package (12 oz) milk chocolate chips

Preheat your oven to 375 degrees.

In a bowl, whisk together flour, baking soda and salt. In a separate bowl, cream butter and sugars. Add egg, vanilla and applesauce and mix well. Gradually add the flour mixture to the wet and mix thoroughly. When well combined, add the oats, followed by the chocolate chips and mix well. Drop by scoopfuls/spoonfuls onto an ungreased cookie sheet. Bake at 375 for 9-10 minutes. Makes about 4 dozen cookies.

Enjoy with a tall glass of milk or a hot cup of coffee. Yummmmm...... :)

Monday, February 8, 2010

Aunt Ethel's Cobbler

Having recently stumbled upon a massive cache of frozen blueberries, I've been mulling over how to best use them - ice cream? sorbet? maybe pie? Then I came across the Huckle Buckle recipe contest over at Fat of the Land and knew immediately what I wanted to do with all of those lovely berries - make up a batch of Aunt Ethel's cobbler.


Aunt Ethel was the baker in my Grandmother's generation. She made this incredible cobbler for every family reunion and I remember passing up the home made ice cream for seconds on cobbler. Oh the calorie-careless days of youth...

Anyway, this is my version of Aunt Ethel's recipe. You can use just about any fruit that you want with this cobbler batter, but I most often use berries (blueberries, huckleberries or blackberries, typically) or, once in a while, peaches. My absolute favorite thing about this recipe - besides the taste! - is that it is SO quick and simple to make. I have mentioned my ineptitude at baking many times, but my success with this cobbler proves that foolproof recipes do exist, and if you're really lucky, you also have a really cool Great Aunt to give them to you. ;) Without further ado, Aunt Ethel's Cobbler-

Batter-
1/2 Stick Butter
1 1/2 c. Sugar
2 c. flour
1 c. milk
1 tsp. salt
1 tbsp. baking powder

Fruit-
1 1/2 c. blueberries (or just about any fruit)
1 tbsp sugar

Preheat oven to 350 degrees. Melt butter in a 11x7 (or similar size) casserole dish in the oven. Remove and let butter cool slightly.

In a large mixing bowl, mix the sugar, flour, salt & baking powder well.

In a separate bowl, measure out your berries or other fruits and sprinkle them with the tablespoon of sugar. Toss well.

Finally, add milk to the flour mixture and mix well until a thick batter forms. Pour the batter into the buttery casserole dish. Some butter will come up over the batter, that is ok. Lastly, sprinkle/drop the sugared berries into the batter - do not stir. Bake @ 350 degrees for about 1 hour, checking every so often to ensure that the top doesn't get too brown before the middle has had a chance to set-up. If you see this happening, you can put a piece of foil over the top to slow things down a bit. Check for doneness with a toothpick. Allow to cool for at least 10 minutes before serving.

This tastes AMAZING with vanilla ice cream, but is pretty fantastic all by itself.

Wednesday, December 16, 2009

Amish Bread, Variation #745

If you know me, then you probably know that as much as I love to cook, I generally fear & dislike baking. It's all of the delicate chemistry involved. You aren't supposed to substitute or improvise when making a bread or dough, the leavening & gluten are too persnickity to be monkeyed with by a haphazard cook. Especially one with a cruddy, barely-functioning oven, such as mine.

That must be why, then, that my adventures with Amish bread have me so excited and verbose today. I've somehow managed to produce another successful batch of two dozen baby loaves (a doubled recipe) with a new assortment of hastily improvised and substitued ingredients. Here is today's re-revised recipe, and a link, once again to the original.

Amish Bread o' the day-
(This is the ingredient list, not including the starter.)

wet ingredients
1/2 c. oil
1/2 c. pumpkin puree (homemade, thank you very much!)
1 c. milk
1/4 c. maple syrup
1/4 c. fireweed honey
3 eggs
1 tsp vanilla

dry ingredients
2 c. unbleached flour
1/2 c. sugar (I prefer turbinado)
1 1/2 tsp. baking powder (I use the aluminum-free stuff from Bob's Red Mill)
1 1/2 tsp. cinnamon
1 tsp. pumpkin pie spice mix
1/2 tsp. baking soda
1/6 c. cornstarch
1/2 tsp. salt
1 cup nuts (optional) - I've added chocolate chips instead on a few occasions.

Add dry ingredients to wet ingredients. Mix and pour into well buttered bread pans. Bake at 325 degrees for about and hour, or until a toothpick comes out clean. - I also cover the pan loosely with aluminum foil about 3/4 of the way through the baking process to keep the top crust from over-browning while giving the loaf a chance to finish cooking throughout.

Additional notes - I actually preheat the oven to 350, and turn down to 325 just after the bread goes in. I just read about this little trick in The Bread Bible and it seems to me that the bread rose a little better with the extra boost of heat early in the baking process. After the bread was out of the oven, de-panned and cooled, I brushed the tops of the loaves with just a little maple syrup and sprinkled coarse, turbinado sugar on top.

And seriously, folks, if you need a bread starter, drop me a line.

Monday, November 23, 2009

Amish Bread, you are a harsh mistress

This madness all started with my mother. Like a drug pusher, she foisted onto me what has to be the world's most annoying snack, Amish Friendship Bread, mainly by roping my children in with "a taste". Look, Chelle! The girls like it! Here, take home a starter... And so it began.

It is the chain letter of baked goods, the rabbit of breads, with each batch spawning three additional "starters" that are meant to be given away to friends and neighbors, hence, the "friendship" thing. I find myself concerned that the opposite might end up being true. If I keep trying to pawn this beast off on people, I fear that I might actually start losing friends.

In addition to my issues with it's reproductive habits, I have multiple beefs with this recipe, starting with the Amish bit. Amish, really? Since when do the Amish add a box of Jello instant pudding to anything? Secondly, was this recipe invented by the owner of a grocery store? Good Lord, look at that ingredient list! Yet I grudgingly bake up a batch (or 4) of bread every time the starter comes due to bake, because my girlies love the stuff. Hence my deep-seated contempt.

In the event that you are crazy enough to try and take this on - PLEASE let me know, because I always have a starter going. Additionally, I have made a few minor modifications to the main recipe that I think have improved it. Here is the original recipe (post starter phase), with my modifications -

wet ingredients
1 cup oil 1/2 c. oil & 1/2 c. chunky applesauce
1/2 c. milk 1/2 c. egg nog
3 eggs
1 tsp vanilla

dry ingredients
2 c. flour (I tried 1/2 white & 1/2 wheat, but I didn't care for the texture.)
1 c. sugar (or 1/2 c. sugar, 1/2 c. maple syrup)
1 1/2 tsp. baking powder (I use the aluminum-free stuff from Bob's Red Mill)
2 tsp. cinnamon 1 1/2 tsp. cinnamon & 1 tsp. pumpkin pie spice mix
1/2 tsp. baking soda
1 (5.1 oz) box instant vanilla pudding 1/6 c. cornstarch & 1/6 c. sugar
(seriously, read the ingredients on a box of instant pudding - sugar & cornstarch)
1/2 tsp. salt
1 cup nuts (optional) - I've added chocolate chips instead on a few occasions.

Add dry ingredients to wet ingredients. Mix and pour into well greased and sugared bread pans. Bake at 325 degrees for 1 hour until a toothpick comes out clean. - I also cover the pan loosely with aluminum foil about 3/4 of the way through the baking process to keep the top crust from over-browning while giving the loaf a chance to finish cooking throughout.


That is a pain in the butt, as professed, no? But my monkey-girls love the stuff so much that I just keep on making it. I'm thinking of some more possible modifications/incarnations - maybe adding a little solid-pack pumpkin or grated zucchini? Walnut oil instead of vegetable oil? Hmmm....

At any rate, if you think yourself up to the task of baking every 10 days, like it or not, like clockwork, and want a starter, drop me a line. But, when you find your kitchen counters covered in baggies and tupperware full of bread batter, and friends going out of their way to avoid being "gifted" with a starter - don't say you weren't warned.